1st Look At Thrive Architect Part 1
This is part one of my first look at Thrive Architect. It gives first impressions getting started, the editor sidebar and the foundation elements. The next part will go over foundation elements and other stuffs…

CAUTION: This original article was written in 2018 using a WordPress plugin which is not available in this 2021 re-posting on a different platform. Somehow, the images were lost, but I am keeping it for sentimental reasons. At the time, it was a gamechanger.
First off, I was highly impressed with the the Thrive Architect editor. I am of the fine habit of not fixing things that are not broken, but I had built this blog with Elegant Theme’s Divi and Thrive just appealed so much more to the marketer in me. In fact, if you are in business and you do not consider yourself a marketer, I am not sure how long that can continue to work (assuming that it is working).
We’ve used ClickFunnels for some time and it is awesome for our sales funnels… but. I am a creator and have been known to overshare in the name of being helpful and encouraging. This blog is something that I do that is cathartic and affirming. ClickFunnels isn’t made for blogging; WordPress is. And Thrive Themes has impressed me lately as my best ally for blogging and marketing.
Here me here. We use ClickFunnels almost exclusively for marketing funnels, membership sites, affiliate programs, courses, and payments. What Russell Brunson and his team has built in such a short time is nothing less than remarkable. However, if you have a heap of content to assimilate and distribute, you need a content management system like WordPress.
I’ve been a web developer for nearly 20 years and have managed, hosted or created a lot of WordPress websites for my endeavors and for my clients over the years. As far as WYSIWYG drag-and-drop editors go, Visual Composer was my first entry into the space… Wow! I remember it like yesterday. I was able to turn over some of the updates of their websites to my clients. Some of them really got into it, others, not so much. This new way of working was utterly fantastic. The next iteration for me was Elegant Themes Divi. Nice job there too. In fact, I probably still have some Divi stuff to clean up on this website from when I switched to Thrive Themes.
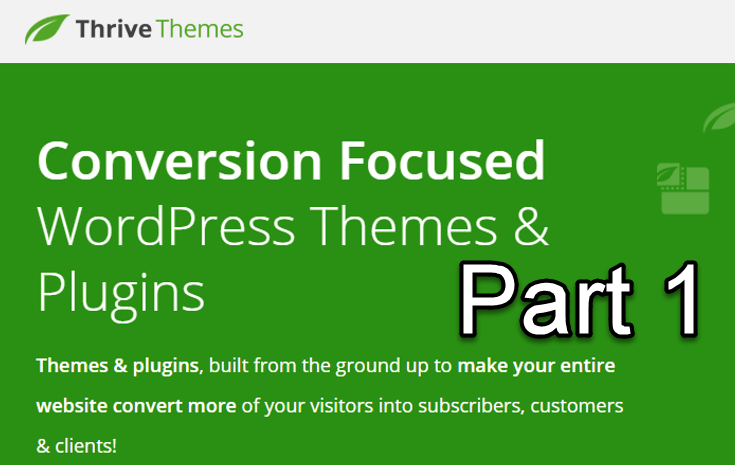
The first thing that caught my attention with Thrive is the focus on conversions. That is a huge differentiator. Marketing is the number one reason to have a website. Period. A website is a marketing asset. It just makes sense to focus on actually positioning a website to be an integral player in your marketing plan and having the tools that you use to build that website point to your marketing objectives.
After I made the switch and installed the Thrive Architect plugin, I (couldn’t help but) compare the editor to ClickFunnels. I AM a #funnelhacker after all! Firstly, the editor elements were on the left side. My thoughts were… well, ok. They must have just wanted to be different. Then I watched this video and found out that you can actually MOVE the editor menu to the right side. Well there goes that…
The ability to either change an entire paragraph or change just a part of a paragraph was a new trick too. The CSS-like padding or margin box was great as well. It almost reminds me of a stadium seating chart.

If you want total control over what happens when a visitor clicks or hovers, or almost anything on your website, use Animation and Action Options.
The solution before this one was the event manager in Thrive Content Builder. Thrive Content Builder let you choose an element on your page and create if-then-actions. For example, if someone clicks on this, then do that. All of this is still available and much more accessible in Thrive Architect.
Animation & Action Options
Let’s add a header…

When you put your cursor on the line of text in the header, the options menu for this heading element auto-shows in the Thrive Architect text options. When you choose the Animation and Action drop-down, notice that you can only add an animation. When you choose an animation, it will automatically preview so you can see what it will look like. If you tick the Loop Animation checkbox, the animation will trigger each time that text element comes into view. If you do not tick the Loop Animation checkbox, the animation will only trigger the first time the element comes into view.

Loop Animation Checkbox
Example such as:
Animate Once – Zoom In
Loop Animate – Zoom Out
To see the difference between having Loop Animation checked or not in the above example, scroll the page up and down. Notice that ANIMATE ONCE – ZOOM IN only zooms in once and LOOP ANIMATE – ZOOM OUT animates each time you scroll to see it reappear into the view port.
On other elements, you have more options. For example, on a content box you can have the animation trigger when you hoover it instead of when it comes in (or out) of view.
Manage Animations

To preview animations, click on the eye icon. To edit animations, click on the edit icon. Remove an animation by clicking on the X. You can also create a tool-tip some elements and decide which side of the element that you want the tool-tip to appear on and choose whether you want the tool-tip to be in a light or dark style.
Content Boxes
You can apply links to entire elements! Of course, you can add a link to text, links or images, but you can also apply the link to the container that the element is in. For example, if an image is in a content box, you can link just the image, or you can have the link available if someone clicks anywhere, i.e., in a box, on text, inside the box or the icon inside the box, for example. This allows you to make any element a clickable call to action link.

Add Link To Entire Content Box
Images and Video
This was neat. In the Animations and Actions tab for an image, you can apply an action to play a video when the image is clicked. And even beyond that, decide whether the video will autoplay, hide title, hide the logo, hide controls, hide full-screen and even hide those annoying related videos that (especially YouTube) will show when your video ends. The HIDE RELATED setting is especially helpful because YouTube will often times someone else’s video instead of another one of yours!
Click the image below. It pops up a lightbox and plays a video from YouTube called, “How To Know The Font A Website is Using.” This is called applying an overlay. This feature essentially replaces a plugin that only does this one thing and Thrive Themes does it natively. You can also use this functionality to control lightboxes and states in Thrive Leads opt-in forms.

Nephew
The above image is inside a content box that has a pattern layer added to the content box at a slanted angle. Very cool. While this very text box has padding set to 74 on the left and the right. This was set in the Layout & Position tab of the paragraph options. It created this set-in from outer edges effect which creates emphasis and interest. The image also has a 270 degree colored shadow added to the image border and to the caption text.

You can make images in overlays open on any link, click or button click in addition to making a larger version or a crop of an image open on-click.
Use the Animation and Action panel for more control over what happens when an image is clicked.
To just show the full size version of an image on-click, use the Image Options panel.
Video
The above video has the Lifted Style2 Video Style applied to it. You are also able to toggle options like autoplay, hide title, hide logo, hide related, hide controls, and hide full-screen on videos.
Find options to hide the video on desktop, tablet or mobile devices in the responsive of video options. To preview how the video (or any element) looks on a different device, choose the Responsive View icon left of the save button at the bottom of the options panel.

Video Options
The other super awesome thing you can do in video options is set the start time of the video. I am totally looking forward to the day when we can set both the start time and the finish time, but for now, this saves me the trouble of having to create the start time link from YouTube.
Overall, I must say… so far, I am very impressed.
Undo, Redo and Revisions
For this section, I added 3 columns with a 2/4, 1/4, 1/4 configuration. The left 2/4 column has an image of the columns menu, the middle column has text. I changed the color of the middle text to match the image, but it is selectable text!… go ahead, try it. This will help with SEO and it creates the feeling of one image with three parts… but NOT! {smile} I even added a little shadow to the caption of the Undo, Redo, and Revisions image. You won’t see it unless you hoover over it though. Yes, it’s kinda tacky and I don’t like it. I was just curious what I could do. So there.

Click Image for Larger Image
The “Undo, Redo, and Revisions image is tiny! …just click on it to see it’s larger version. Presto!

Redo and undo weren’t game changers, we have that as standard features in lots of programs. I must say however, that this is the first WordPress editor that I can remember that made undo and redo so easy todo. And yes, the Ctrl-Z keyboard shortcut works here just like it does everywhere else.
Revisions are impressive. You see it in the image above right below preview.
oh… preview. It’s nice too. Usually I would have save and refresh a new tab that has the page open to see if what I just did was okay…. but if you use the preview button, that happens without ever saving! Hmmm… that’s weird. I’ll have to check on that again… BUT. Just don’t forget to save and you’ll be okay.
In fact, Architect will pop up every so often and remind you to do just that.

Save Your Work Reminder
I saw that I could choose to use the default WordPress revision manager and I thought to myself, “I didn’t even know WordPress had a default revision manager.” I guess I didn’t read some manual, but here it is in Thrive Architect, being mega helpful; especially when you do that thing you didn’t mean to do and don’t know what to do!

Keep in mind If you have not saved, the revision isn’t available yet, but as it looks, you can return to the chapter and verse (time and second) that you last saved your work. Save is on the bottom menu. Awesome.
Mobile View

You can make device specific modifications. You can see how your page will look on a table and a phone. You access the responsive view menu just left of the save button.
Decorations
Header & Text Inside Content Box
Decorations let you style the sides of elements like content boxes, background sections, or styled boxes.
You can also use shadows, borders, and rounded corners on decorated elements, but keep in mind that they will not behave the same way as they would on an element without any decorations.
The above content box has an orange background color and a fancy divider added to the bottom side. The name of this divider is “brushed”. I am in love with it and will likely use it many, many times. In fact, I may screenshot it and use it on other platforms to have my messages have a consistent look. The right side of the content box has a 5% tilt slanted edge.
To keep things looking neat, consider only using the fancy divider should only be put next to a white (or solid background) section which has no style applied to it.
The Text Element
Shift+Enter can be used to create a line break without creating a block (paragraph) break. Ctrl+Enter can be used to create a new paragraph block. You can also drag the text block from the side menu into position or just click on it from the side menu to add it to the bottom of the page.
Letter spacing is the first thing that raised my brow. You can also change to all uppercase and lower case letters. I use letter spacing A LOT… take this graphic I did yesterday (Friday), for example. What can I say? I am a topography loving logophile, that’s all!!

Animation can be added to a text block… but be sure to select it first. This didn’t quite work for me. I must have done something wrong. That’s okay, because I couldn’t immediately think of a game-changing use case for it anyway.
To change the text options found in other elements, like for a button (for example); that will be labeled “typography” under that elements options.
Text options also include familiar things like bold, underline, italic, and strike-through. Those options are in the top menu when you select a paragraph. To create a link on text choose the link icon or press Ctrl+K on your keyboard.
You can also link to other websites and pages, posts, media or events on your website. The gear icon allows you to choose which elements are searched when you type in a keyword.
Here is a good place to mention how to edit the gutter width between two objects in a column. Select COLUMN from the bread crumb and adjust the gutter width slider from the menu.


Images
Styles are available for images. The following block has 4 columns with an image element in each. The first one has the “lifted” style applied. The second one has the rounded corners style. The third is round, and the fourth has caption overlay. There is also a polaroid style, and framed styles.
If you give the image a title, it can be seen when you hoover the image. The round one has a title that says, “THIS HERE IS A TITLE”.

Image effects allow you to do things like adjust grayscale, opacity, blur and color overlay.

Get Thrive Architect – thrivethemes.com/architect/
Buttons
The options for buttons are straight forward. Unique things to do is add secondary text, create a full width button, and add a button divider (with or without an icon). It is helpful that the icon picker is searchable, which is more than I can say for the emoji picker on Facebook… (just sayin’). This may be good or bad… the search finds partial matches so typing “hair” will return things like “wheelcHAIR“.
![]()
![]()
Columns
When you place the column element a menu pops up to let you choose two, three or four columns and their proportions. There are two methods to place columns on the canvas; (1) Drag the columns element and place it into the editor wherever you choose or; (2) Drag the element to the side of an existing element to automatically create a new column on that side. You can choose the proportions for the column using the gutter slider or click and drag the column borders like this….

There are also options to adjust the height, reverse the column order, the vertical position, whether to wrap columns on a medium screen size or to stretch the columns to fit the screen. You can drag any element to place into a column. Be careful. Don’t overdo it.
Background Sections
Use the vertical alignment lets you align content in the background section to the top, center or bottom of the background section. Add a solid layer or a video background with the Background Style section of background options. You can choose a YouTube, Wistia or Vimeo video or choose custom and upload your own. This can also be used to add layers with effects to the images or columns of the section as well as grayscale, opacity, color, or patterns. The effects can be stacked differently by dragging them within the background style. Use the Toggle Stretch To Fit in Background Sections options.

The decorations allow you to customize the sides of the background section. The divider style lets you add a yummy curved decoration and more. You can drag text onto the background section. Adding text onto a video is a neat feature.
I was having trouble uploading a .gif file showing a feature of the background section. It was giving me a HTTP error because the file was too big. Well, as a solution, I created the .gif as a video, uploaded it to YouTube as an unlisted video and added it to a auto-play video element like this… (yay!)
The following is an colored, entire screen width background section with some fancy wave dividers added to the top side.
Templates and Symbols
Templates and Symbols allows you to save an element that you have customized on one page for use on another page. A template and a symbol is saved in the same way, but if you
For example, if you load a template on 10 pages and change it on one of the pages, the change will only be seen on the page you changed. If you load an element as a symbol and place it on 10 different pages, then edit the symbol on one of the pages, that change will be seen on every page that symbol was placed. Got it?

For example… we want to use a special content box with brushed and slanted edges to use on this blog. For the example I will style the longest verse in the Bible…
“Then were the king’s scribes called at that time in the third month, that is, the month Sivan, on the three and twentieth day thereof; and it was written according to all that Mordecai commanded unto the Jews, and to the lieutenants, and the deputies and rulers of the provinces which are from India unto Ethiopia, an hundred twenty and seven provinces, unto every province according to the writing thereof, and unto every people after their language, and to the Jews according to their writing, and according to their language.” ~Esther 8:9
To save a template or symbol, select the element and use the tiny save button next to it’s name. Give it a name and decide if you want to add it to a category. If you use categories on your website to organize things, the category option in this save dialog box will allow you to organize your saved content according to that same scheme.

To load a template or a symbol, use the Template and Symbols element from the Foundation elements. When you load a template onto a page, and look at it in the Thrive Architect editor, you cannot tell that it is a template, but when you load a symbol onto a page the border of the element turns orange and you can use the editor menu to edit the symbol or unlink it (which means that the content will stop being a “symbol”. When you are editing a symbol, the bread crumb in the navigation bar turns orange to let you know that you are now editing the symbol, and not the page that the symbol is on.
Remember, that editing a symbol edits all of those symbols on all of the pages that symbol is on. You can keep track of all of the pages that you have Thrive symbols on by always adding them into categories.
You can also manage symbols using the Templates and Symbols card in the Thrive Dashboard on your WordPress backend menu. You can also create a new symbol from that same dashboard card. It will open Architect and allow you to built it.

To save an entire page as a template, choose the gear from the Architect menu and then choose Template Setup to Save Content as Template.

Headers and Footers
Like templates and symbols, headers and footers can be managed from the Thrive Dashboard. Choose the Global Elements card. In this card, you can change the name of saved elements, make a copy, delete them, edit existing ones, or create new ones. When you edit a header or footer. It will update on every page that uses that header and footer.
The creative flexibility that Architect gives for headers and footers is magnificent. There are even options to do things like make the header static – meaning it stays put when the user scrolls; or to make it sticky – meaning the content seems to roll under it to leave the header always in view.